Friday, December 31, 2010

High Speed Photography

Ever wonder how does the ballon looks like when it pops? Well, I do, since I was a child maybe?

I used 1 week of research on the internet, I decided to DIY myself a sound trigger. I searched the whole internet, I can't find any Malaysian did high-speed photography (well, at least not in Lowyat, Cari, Myphotocity and Photoclub), means no one to teach me. Sad case.

So, I use another week to research with foreign website. The reason that I don't like to do research in foreign website is because the electrical components used are somehow a little different from Malaysia.

It took me 4 weeks to complete the circuit including some trials and errors. But most of the time was used to find all the components. The most difficult component to get was the SCR (Silicon Controlled Rectifier)-EC103D. Damn! Even the shopkeeper doesn't know what was that! Luckily I found it in the end. And then there was this PC Cord, it took me 4 weeks to get it-.-

I was lucky that one forumer that was an expert in electronics helped me throughout the making of the circuit. Thank You! Finding the balloon was also a difficult task-.-, not much place got sell in my area.

If you want to know how I take these pictures, leave a comment in the chatbox on the right hand side of the blog. I'll post my setup on the next post.

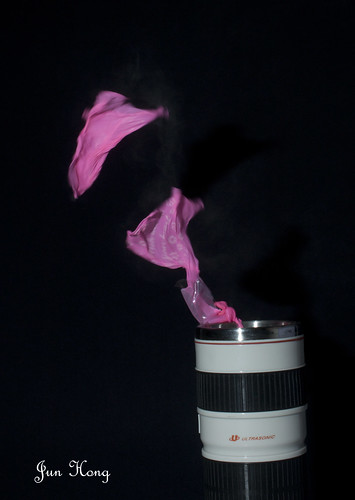
OK, by now you maybe bored by words, so PICTURES!!!!

1)


2)


3)


4)


5)


6)


7)


8)


9)Side View


10)

Saturday, December 4, 2010

Water Drop Photography

Well, this is the 3rd time I attempt water drop photography. The 1st time was a success, but the colour is too dull. nothing special. The second time was a total failure. No dramatic splashes, no colour. Just 2 words: EPIC FAIL!

And now the 3rd time, I have only to objective.
1)Nice splash
2)Nice colour

After taking 200+ of pictures, I chose 6 of them.
Here they are:

1)


2)


3)


4)


5)


6)

Thursday, December 2, 2010

Smoke Photography

Things used:
1)1 Incense stick
2)Small lump of plasticine
3)Black shirt
4)Canon 430EX II on Phottix Aster wireless trigger
5)Lighter
6)Photoshop CS5
7)Torchlight

Set up:
I stick the incense stick on to the lump of plasticine. The flash is placed on the right hand side of the incense stick. Then I light the incense stick with the lighter. I used the torchlight to light up the smoke so it's easier for me to focus on it. The black shirt is used as background so it's easier for me to edit in photoshop. After taking the photos, I edited the picture in CS5.

Final Results:
Always loved this colour.(red+black) A friend of mine taught me this colour match.


Rainbow Colour


Black & White


Yellow, Green, Blue


Rainbow Colour with Black Background