Wednesday, November 30, 2011

I'm Back!!!

Finally, after 7 months, my blog seriously needs to be resurrected.

Dad suddenly ask me where would I like to go this Sunday because he's free. Straight away i just blurted out:" Penang Bridge!" I've always wanted to take photos of it's sexy shape :p
Anyways, we stop by this place(purple tag):


And me and dad was like waiting from 5.30am till 7am for the sunrise. Unfortunately the sun didn't show up. But the sky looks super dramatic, so it's still worth the wait. Okay, done talking. Pictures:


Friday, January 7, 2011

How I shoot High-speed!

Want to know how did I take balloon popping photos? I'll teach you for RM10. Great deal huh? Email me at i.am.jj@hotmail.com if you're interested.


Just kidding. Imma tell you for free! LOL

For this, you'll need to built a sound trigger, which you can search for the circuit with uncle Google! I built mine using the Hiviz circuit. The Hiviz website teaches you everything about high-speed photography. And the instructions for building the circuit are very very detailed. Just follow the instruction will do.


Building the circuit is not difficult. In fact, if you're building a Hiviz set, you don't even need any electronic knowledge to build one, since the website gives superb detail instructions building one. The difficult part is finding the parts. Took me 4 weeks to gather all the materials. Especially the SCR and the PC-cord. If you want to find the electrical component, I recommend Gem-One which is located in Komtar. Many types of component sold there.
GEM-one Electronics - Komtar 2nd floor
04-2616488
04-2617968

As for the PC Cord and Hot-Shoe adapter, especially the PC Cord, took me 4 months to get it because no stock. I went to ask most of the camera shop in Penang Road and some shop at Prangin Mall. At last I bought it at Click N Snap, located at Penang Road there. Also recommend Hike Enterprise. Both shop have EXCELLENT service. Unlike most of the camera shop, didn't give service. Got service also very bad. Don't care you also. Some still give me "black face" see. So what if I'm just a teenager. It doesn't mean I can't be a customer.


So, the total cost for the circuit was approximately RM58.60
Electrical Components(including breadboard)-RM28.60
PC Cord-RM10
Hot Shoe Adapter-RM20


My ugly-ass looking circuit. Click here to see the notes


Setup
Things used:

Balloons!


Needles! (to pop balloon) Popping the balloon is super fun!


The L lens!


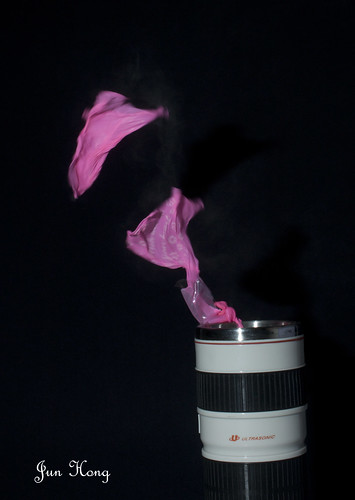
Ok, it was just a thermos. I wish I have the real thing. :( I use it to place the balloon.


Here's the behind-the-scene photo. Click here to see the notes


If you need help, contact me through facebook, which can be found at the upper right of the blog, under the About Me tab. I'll try to help.

Sunday, January 2, 2011

High Speed Photography Concept

This is going to be a very long post. But if you want to take high-speed photos, you need to understand the concept first.

Ok, I was asked about how to take pictures of the balloon popping. When I told them I used 2 sec shutter speed. They were like "2 sec? Serious?". Yes, I'm serious.
So let me explain the concept of High Speed Photography.

1) First of all, do you know what photography means?
Photography is originally a greek word so it has the same meaning in greek. It consists of two words put together. "photo" which derives from "phos" and it means "light" in english, and graphy,which probably derives from graphi , which can mean drawing. The exact form in greek is φωτογραφία (fotografia) So without light, you can't draw. Even when you open your shutter for 30secs in a totally dark room, your picture will still come out pitch-black. On the other hand, when it's bright enough, you can take a sharp/clear picture even at 1/4000 sec!

2)High speed vs Full flash
High speed photography is similar to full flash photography. Full flash photography means the object in the pictures you take are all illuminated with the light. Imagine/experiment that you are in a total dark room and I mean TOTAL darkness. Set your camera on a tripod and place an object in front of it. Then set your shutter speed to 30secs. After you take your shot, what you will see is a total black picture in your LCD screen. Then take another picture with the same setting. But this time, flash your speedlite towards the object when the shutter is open. Now, what you'll see in your camera LCD screen is the object which is illuminate by the flash.
Why does this happen? Because the camera only "sees" object that is bright. Same concept for using the film.

3) Flash power and Flash duration
In high speed photography, since all the light are from the flash, the actual shutter is the flash duration!

Here is some data on the 580ex ii's flash duration. source: http://www.rodandcone.com/2008/05/flash-durations-for-canon-580ex-ii-and.html As you can see, the higher the flash power, the longer the flash duration.

Canon 580EX II -- Distance from Flash to Sensor: 2 feet
1/128 power = 1/10714 seconds Flash Duration
1/64 power = 1/7894 seconds
1/32 power = 1/5464 seconds
1/16 power = 1/3785 seconds
1/8 power = 1/2650 seconds
1/4 power = 1/1716 seconds
1/2 power = 1/1017 seconds
Full power = 1/177 seconds

So, when u shoot at 1/128 power on the 580EX II, the actual shutter speed is 1/10714sec! Well e need high shutter speed for shooting high speed photography like balloon popping, don't we?

That's most of all you need to know about high speed photography. Stay tuned for the next post- How to take high speed photos!


Friday, December 31, 2010

High Speed Photography

Ever wonder how does the ballon looks like when it pops? Well, I do, since I was a child maybe?

I used 1 week of research on the internet, I decided to DIY myself a sound trigger. I searched the whole internet, I can't find any Malaysian did high-speed photography (well, at least not in Lowyat, Cari, Myphotocity and Photoclub), means no one to teach me. Sad case.

So, I use another week to research with foreign website. The reason that I don't like to do research in foreign website is because the electrical components used are somehow a little different from Malaysia.

It took me 4 weeks to complete the circuit including some trials and errors. But most of the time was used to find all the components. The most difficult component to get was the SCR (Silicon Controlled Rectifier)-EC103D. Damn! Even the shopkeeper doesn't know what was that! Luckily I found it in the end. And then there was this PC Cord, it took me 4 weeks to get it-.-

I was lucky that one forumer that was an expert in electronics helped me throughout the making of the circuit. Thank You! Finding the balloon was also a difficult task-.-, not much place got sell in my area.

If you want to know how I take these pictures, leave a comment in the chatbox on the right hand side of the blog. I'll post my setup on the next post.

OK, by now you maybe bored by words, so PICTURES!!!!

1)


2)


3)


4)


5)


6)


7)


8)


9)Side View


10)

Saturday, December 4, 2010

Water Drop Photography

Well, this is the 3rd time I attempt water drop photography. The 1st time was a success, but the colour is too dull. nothing special. The second time was a total failure. No dramatic splashes, no colour. Just 2 words: EPIC FAIL!

And now the 3rd time, I have only to objective.
1)Nice splash
2)Nice colour

After taking 200+ of pictures, I chose 6 of them.
Here they are:

1)


2)


3)


4)


5)


6)

Thursday, December 2, 2010

Smoke Photography

Things used:
1)1 Incense stick
2)Small lump of plasticine
3)Black shirt
4)Canon 430EX II on Phottix Aster wireless trigger
5)Lighter
6)Photoshop CS5
7)Torchlight

Set up:
I stick the incense stick on to the lump of plasticine. The flash is placed on the right hand side of the incense stick. Then I light the incense stick with the lighter. I used the torchlight to light up the smoke so it's easier for me to focus on it. The black shirt is used as background so it's easier for me to edit in photoshop. After taking the photos, I edited the picture in CS5.

Final Results:
Always loved this colour.(red+black) A friend of mine taught me this colour match.


Rainbow Colour


Black & White


Yellow, Green, Blue


Rainbow Colour with Black Background

Tuesday, November 30, 2010

An evening at Tanjung Bungah beach

I'm finally back on blogging! After I abandoned my blog for about 5 months.

I want to try landscape photography lately. I decided to take a picture of a sunset at the beach. So, my dad brought me to a beach. The truth is we don't know which beach to go. So we ended up at the beach behind Tanjung Bungah Hotel. Unfortunately, there's no sunset. So I forget about the sunset and compose my picture at the beach. Luckily the photos turn out to be good and I'm satisfied.


Beach with Rainbow


Blue~